Everett Lawn Care LLC

Professional Landscaping in Raleigh, NC

Everett Lawn Care provides mowing, aeration, seeding, sod installation, mulch, cleanups, landscaping, and pressure washing in Raleigh and Wake County.

Serving Raleigh, Cary, Apex, Holly Springs, Wake Forest, and nearby Triangle cities.

Request an estimate · Contact us · (919) 899-2341 · info@everett-lawncare.com

5300 Six Forks Rd, Raleigh, NC 27609

How to Reduce Thatch Before Lawn Aeration

By Everett McLain

Last Updated: November 1, 2026

Quick Summary

To reduce thatch before lawn aeration, measure the layer first and only dethatch if it is over ½ inch deep. Water the day before, set the dethatcher shallow at about ¼ inch, make two passes at most, then bag the debris and aerate a few days to a week later.

  • Thatch becomes a problem around ½ inch; below that, skip dethatching and aerate only.
  • Water deeply one to two days before dethatching so the soil is damp but not muddy.
  • Start with dethatcher tines set about ¼ inch into the thatch layer.
  • Make two passes at most; a third pass risks damaging the lawn.
  • Wait a few days to a week after dethatching before aerating.

Table of Contents

What Thatch Is and Why It Blocks Aeration

Thatch is the layer of dead and living plant material that builds up between the grass blades and the soil surface.

Thatch forms from stems, runners, and roots that break down slowly. When grass grows faster than it decays, the layer thickens. This most often happens on lawns that get heavy watering and regular feeding but little soil contact.

Why does it block aeration? Core aeration pulls soil plugs to relieve compaction. A mat of thatch sits on top of the soil, so the aerator tines hit that spongy layer first.

Healthy Thatch Versus Excessive Thatch

A thin thatch layer is your friend. It shades soil, holds some moisture, and cushions the grass. The problem starts when that layer gets too thick. A common rule of thumb is that thatch becomes a problem around ½ inch. Below that, leave it alone. Above it, consider removing some before you aerate.

  • Healthy thatch: a thin layer that breaks down naturally
  • Excessive thatch: a thick, spongy mat that blocks water and air
  • The signal to act: when your finger sinks into a springy layer instead of firm soil

How to Measure Thatch in a Lawn

Learning how to measure thatch in a lawn takes about a minute and no special tools. Push a finger or a small trowel into the grass until you hit firm soil.

Do this in several spots, not just one. Lawns vary from the sunny front yard to the shaded side. Write down each reading so you can compare.

Here's a simple way to read the results:

Thatch Depth What It Means What to Do
Under ¼ inch Healthy layer Skip dethatching
¼ to ½ inch Borderline Monitor and aerate only
½ to ¾ inch Excessive Dethatch before aerating
Over ¾ inch Heavy mat Dethatch, then aerate and overseed

If your soil feels rock hard under the thatch, you may also have compaction. Clay-heavy yards often show both problems at once, which is why clay soil lawn care fixes are worth reviewing alongside your thatch readings.

Dethatching vs Aeration: What Each One Fixes

Dethatching and aeration solve different problems, and mixing them up wastes time and money. Dethatching removes the fibrous mat sitting on top of the soil. Aeration relieves compaction by pulling cores from the soil itself.

Think of it this way: dethatching clears the roof, aeration opens the door. If you aerate through a heavy thatch layer, the tines can't reach the soil. That's why the order matters. Remove the mat first, then punch holes in the ground.

For more on the aeration process, see our expert lawn aeration for landscaping page.

Signs of Soil Compaction

Compaction hides under the surface, but the lawn tells you. Watch for these clues:

  • Water puddles on top instead of soaking in
  • Grass looks thin and worn, even with regular watering
  • Weeds like plantain and dandelion move in
  • The soil resists a screwdriver pushed into it
  • Foot traffic paths turn bare and hard

When you spot these signs alongside a thick thatch layer, dethatch first, then aerate.

The Best Time to Dethatch a Lawn

The best time to dethatch a lawn depends on your grass type, not the calendar on your wall. Cool-season grasses like tall fescue do best when dethatched in early fall or early spring, while the grass is actively growing but not stressed by summer heat.

Timing matters because dethatching stresses the lawn. You want the grass strong enough to recover fast. Dethatching in the middle of a drought or a heat wave invites damage.

Lawn Aeration Preparation: Moisture, Mowing, and Marking

Good lawn aeration preparation makes the difference between clean soil cores and a machine that skips across the surface. The single most important step is moisture. Water the lawn deeply one to two days before the work. The soil should feel damp but not muddy. Dry soil resists the tines; soggy soil tears.

Instant Estimate →

Next, mow the lawn a little shorter than usual. Short grass lets the equipment reach the soil and makes cleanup easier. Then mark your sprinkler heads, shallow lines, and any buried cables with flags so nothing gets hit.

  • Water deeply 1-2 days ahead
  • Mow short and bag the clippings
  • Flag sprinklers, lines, and cables
  • Pick a mild day, not the hottest one

Step-by-Step: How to Reduce Thatch Without Damaging the Lawn

The safe way to reduce thatch is to remove a little at a time and let the grass recover. The query asks specifically about reducing thatch before aeration, so the technique below focuses on tool settings, pass counts, and avoiding excessive removal. Here is the process we follow:

  1. Measure first. Confirm the thatch is over ½ inch before you start. If it is under ½ inch, skip dethatching and go straight to aeration.
  2. Water the day before. Soft soil and slightly damp thatch pull up easier. Aim for damp but not muddy; dry thatch shatters and soggy thatch tears.
  3. Set the dethatcher shallow. Start with the tines set to skim the surface, about ¼ inch into the thatch layer. Most power dethatchers have a depth adjustment; begin at the shallowest setting that still contacts thatch.
  4. Work in straight lines. Overlap each pass by a few inches for even coverage. Keep a steady walking pace; rushing causes the tines to skip and tear.
  5. Go over it twice at most. A second pass in a different direction is fine; a third risks damage. If thatch remains after two passes, stop and aerate instead of making another pass.
  6. Bag the debris. Rake and remove the pulled thatch so it doesn't smother the lawn. Compost it or dispose of it according to local yard-waste rules.
  7. Aerate afterward. Now the tines can reach the soil and pull real cores. Wait until the lawn has recovered from dethatching, typically a few days to a week, before aerating.
  8. Water lightly. Give the lawn a drink to settle the soil and start recovery.
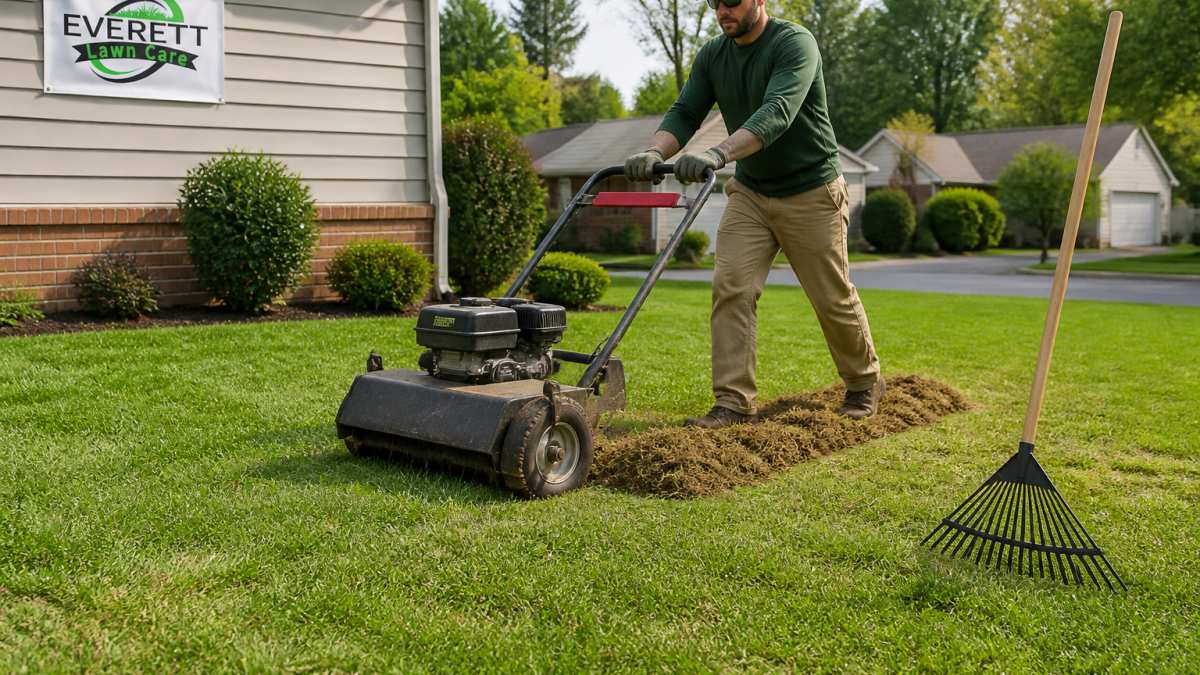
Homeowner using a power dethatcher to reduce thatch on a green lawn with a rake nearby

Watch out: Setting the dethatcher too deep on the first pass can rip healthy roots and leave bare patches. Start shallow and add a second light pass instead.

Choosing a Dethatching Rake or Power Dethatcher

A dethatching rake works fine for small yards and light layers. It costs little and gives you full control. For larger lawns or heavy thatch, a power dethatcher saves hours and pulls a more even layer. The trade-off is cost and a steeper learning curve.

Whichever you pick, keep the tines sharp and the depth shallow. Dull tines tear grass instead of lifting thatch. For power dethatchers, check the tine tension and replace worn tines before starting.

Pro Tip Test a small area first. Run the dethatcher over a 3-foot by 3-foot patch and inspect the result. If the tines are pulling up soil or tearing grass, raise the depth setting before continuing.

Recovery and Cleanup After Dethatching and Aerating

Recovery starts the moment you finish. A sequenced plan for cleanup, watering, feeding, and overseeding makes the difference between a lawn that bounces back and one that thins out. Here is the aftercare schedule we recommend:

Immediately after dethatching and aerating:

  • Rake up the pulled thatch and any soil cores left on top. You can break the cores back into the lawn to return soil to the surface, or remove them if they are heavy.
  • Remove debris from the lawn surface so it doesn't smother grass. Bag it or compost it.

First 24-48 hours:

  • Water lightly to settle the soil and start recovery. Keep the soil moist but not soggy.
  • Keep traffic off the grass for a few days. Foot traffic on freshly dethatched or aerated lawn compacts the soil and damages tender crowns.

Within the first week:

  • This is the right window to overseed, since seed-to-soil contact is best right after aeration. Apply seed at the recommended rate for your grass type and keep the surface moist until germination.
  • If you are not overseeding, apply a starter fertilizer or a balanced fertilizer according to soil test results. For seasonal timing, see when to fertilize fescue in Raleigh. Timing matters, so check with your local extension office or a qualified professional for feeding schedules that fit your recovery window.

Weeks 2-4:

  • Expect some brown, thin patches for a week or two. That's normal. New growth fills in as roots reach the loosened soil.
  • Resume regular watering and mowing once the lawn shows active growth. Keep the mower blade sharp and avoid cutting more than one-third of the blade height at a time.
Key Takeaway A simple rule: dethatch, clean up, water, then aerate. After aerating, overseed and feed within the first week, and keep traffic off until new growth appears.

If you want to compare options first, our lawn care cost guide walks through what drives pricing. When you're ready, request a free estimate for aeration and thatch removal, and we'll map out a plan for your yard.

Get a Free Estimate for Aeration and Thatch Removal

Doing this yourself takes a free weekend, the right equipment, and a steady hand. Many homeowners would rather hand it to a crew that does it every week. Everett Lawn Care is licensed and insured, and serves homeowners and businesses across the Triangle area.

If you want to compare options first, our lawn care cost guide walks through what drives pricing. When you're ready, request a free estimate for aeration and thatch removal, and we'll map out a plan for your yard.

Frequently Asked Questions

Should I dethatch my lawn before aerating it?

Yes, dethatch first when the thatch layer is thicker than about ½ inch. A mat of thatch absorbs the impact of aerator tines, so the machine pulls fewer soil cores and the holes close up faster. Removing thatch gives the tines a clean path into the soil. If your thatch is thin, skip dethatching and go straight to core aeration. Wait a few days between the two jobs so the lawn can settle.

What is better for my lawn, aeration or dethatching?

They solve different problems, so the answer depends on what your lawn needs. Dethatching removes the brown layer of dead stems and roots sitting on the soil surface. Core aeration pulls soil cores to relieve compaction and open channels for air, water, and nutrients. If thatch measures over ½ inch, dethatch first. If the soil is hard and water puddles, aerate. Many lawns in the Triangle need both, in that order.

How do I know if my lawn has too much thatch?

Cut a small square of turf about 3 inches deep with a spade and lift it. Look at the brown, spongy layer between the green grass and the soil. A ¼-inch layer is healthy and breaks down naturally. Anything over ½ inch is excessive and blocks water penetration. You can also press a finger into the turf; if it feels springy like a cushion, thatch is likely too thick.

When should I dethatch and aerate my lawn?

Time both jobs to your grass type. Cool-season grasses such as tall fescue do best in early fall, when temperatures drop and the lawn can recover before winter. Warm-season grasses like Bermuda and zoysia should be dethatched in late spring or early summer, during active growth. Avoid dethatching during summer heat stress or right before dormancy, and make sure the soil is slightly moist, not soggy, on the day you work.


Thick thatch and hard soil won't fix themselves, and the longer you wait, the more the mat builds. Let Everett Lawn Care handle the measuring, dethatching, and core aeration with licensed, insured crews who know local lawns. Get started with Everett Lawn Care and give your grass the air, water, and nutrients it's been missing.

GoogleAdd everett-lawncare.com as a preferred source on Google →

How to Reduce Thatch Before Lawn Aeration

By Everett McLain

Last Updated: November 1, 2026

Quick Summary

To reduce thatch before lawn aeration, measure the layer first and only dethatch if it is over ½ inch deep. Water the day before, set the dethatcher shallow at about ¼ inch, make two passes at most, then bag the debris and aerate a few days to a week later.

  • Thatch becomes a problem around ½ inch; below that, skip dethatching and aerate only.
  • Water deeply one to two days before dethatching so the soil is damp but not muddy.
  • Start with dethatcher tines set about ¼ inch into the thatch layer.
  • Make two passes at most; a third pass risks damaging the lawn.
  • Wait a few days to a week after dethatching before aerating.

Table of Contents

What Thatch Is and Why It Blocks Aeration

Thatch is the layer of dead and living plant material that builds up between the grass blades and the soil surface.

Thatch forms from stems, runners, and roots that break down slowly. When grass grows faster than it decays, the layer thickens. This most often happens on lawns that get heavy watering and regular feeding but little soil contact.

Why does it block aeration? Core aeration pulls soil plugs to relieve compaction. A mat of thatch sits on top of the soil, so the aerator tines hit that spongy layer first.

Healthy Thatch Versus Excessive Thatch

A thin thatch layer is your friend. It shades soil, holds some moisture, and cushions the grass. The problem starts when that layer gets too thick. A common rule of thumb is that thatch becomes a problem around ½ inch. Below that, leave it alone. Above it, consider removing some before you aerate.

  • Healthy thatch: a thin layer that breaks down naturally
  • Excessive thatch: a thick, spongy mat that blocks water and air
  • The signal to act: when your finger sinks into a springy layer instead of firm soil

How to Measure Thatch in a Lawn

Learning how to measure thatch in a lawn takes about a minute and no special tools. Push a finger or a small trowel into the grass until you hit firm soil.

Do this in several spots, not just one. Lawns vary from the sunny front yard to the shaded side. Write down each reading so you can compare.

Here's a simple way to read the results:

Thatch Depth What It Means What to Do
Under ¼ inch Healthy layer Skip dethatching
¼ to ½ inch Borderline Monitor and aerate only
½ to ¾ inch Excessive Dethatch before aerating
Over ¾ inch Heavy mat Dethatch, then aerate and overseed

If your soil feels rock hard under the thatch, you may also have compaction. Clay-heavy yards often show both problems at once, which is why clay soil lawn care fixes are worth reviewing alongside your thatch readings.

Dethatching vs Aeration: What Each One Fixes

Dethatching and aeration solve different problems, and mixing them up wastes time and money. Dethatching removes the fibrous mat sitting on top of the soil. Aeration relieves compaction by pulling cores from the soil itself.

Think of it this way: dethatching clears the roof, aeration opens the door. If you aerate through a heavy thatch layer, the tines can't reach the soil. That's why the order matters. Remove the mat first, then punch holes in the ground.

For more on the aeration process, see our expert lawn aeration for landscaping page.

Signs of Soil Compaction

Compaction hides under the surface, but the lawn tells you. Watch for these clues:

  • Water puddles on top instead of soaking in
  • Grass looks thin and worn, even with regular watering
  • Weeds like plantain and dandelion move in
  • The soil resists a screwdriver pushed into it
  • Foot traffic paths turn bare and hard

When you spot these signs alongside a thick thatch layer, dethatch first, then aerate.

The Best Time to Dethatch a Lawn

The best time to dethatch a lawn depends on your grass type, not the calendar on your wall. Cool-season grasses like tall fescue do best when dethatched in early fall or early spring, while the grass is actively growing but not stressed by summer heat.

Timing matters because dethatching stresses the lawn. You want the grass strong enough to recover fast. Dethatching in the middle of a drought or a heat wave invites damage.

Lawn Aeration Preparation: Moisture, Mowing, and Marking

Good lawn aeration preparation makes the difference between clean soil cores and a machine that skips across the surface. The single most important step is moisture. Water the lawn deeply one to two days before the work. The soil should feel damp but not muddy. Dry soil resists the tines; soggy soil tears.

Instant Estimate →

Next, mow the lawn a little shorter than usual. Short grass lets the equipment reach the soil and makes cleanup easier. Then mark your sprinkler heads, shallow lines, and any buried cables with flags so nothing gets hit.

  • Water deeply 1-2 days ahead
  • Mow short and bag the clippings
  • Flag sprinklers, lines, and cables
  • Pick a mild day, not the hottest one

Step-by-Step: How to Reduce Thatch Without Damaging the Lawn

The safe way to reduce thatch is to remove a little at a time and let the grass recover. The query asks specifically about reducing thatch before aeration, so the technique below focuses on tool settings, pass counts, and avoiding excessive removal. Here is the process we follow:

  1. Measure first. Confirm the thatch is over ½ inch before you start. If it is under ½ inch, skip dethatching and go straight to aeration.
  2. Water the day before. Soft soil and slightly damp thatch pull up easier. Aim for damp but not muddy; dry thatch shatters and soggy thatch tears.
  3. Set the dethatcher shallow. Start with the tines set to skim the surface, about ¼ inch into the thatch layer. Most power dethatchers have a depth adjustment; begin at the shallowest setting that still contacts thatch.
  4. Work in straight lines. Overlap each pass by a few inches for even coverage. Keep a steady walking pace; rushing causes the tines to skip and tear.
  5. Go over it twice at most. A second pass in a different direction is fine; a third risks damage. If thatch remains after two passes, stop and aerate instead of making another pass.
  6. Bag the debris. Rake and remove the pulled thatch so it doesn't smother the lawn. Compost it or dispose of it according to local yard-waste rules.
  7. Aerate afterward. Now the tines can reach the soil and pull real cores. Wait until the lawn has recovered from dethatching, typically a few days to a week, before aerating.
  8. Water lightly. Give the lawn a drink to settle the soil and start recovery.
Homeowner using a power dethatcher to reduce thatch on a green lawn with a rake nearby

Watch out: Setting the dethatcher too deep on the first pass can rip healthy roots and leave bare patches. Start shallow and add a second light pass instead.

Choosing a Dethatching Rake or Power Dethatcher

A dethatching rake works fine for small yards and light layers. It costs little and gives you full control. For larger lawns or heavy thatch, a power dethatcher saves hours and pulls a more even layer. The trade-off is cost and a steeper learning curve.

Whichever you pick, keep the tines sharp and the depth shallow. Dull tines tear grass instead of lifting thatch. For power dethatchers, check the tine tension and replace worn tines before starting.

Pro Tip Test a small area first. Run the dethatcher over a 3-foot by 3-foot patch and inspect the result. If the tines are pulling up soil or tearing grass, raise the depth setting before continuing.

Recovery and Cleanup After Dethatching and Aerating

Recovery starts the moment you finish. A sequenced plan for cleanup, watering, feeding, and overseeding makes the difference between a lawn that bounces back and one that thins out. Here is the aftercare schedule we recommend:

Immediately after dethatching and aerating:

  • Rake up the pulled thatch and any soil cores left on top. You can break the cores back into the lawn to return soil to the surface, or remove them if they are heavy.
  • Remove debris from the lawn surface so it doesn't smother grass. Bag it or compost it.

First 24-48 hours:

  • Water lightly to settle the soil and start recovery. Keep the soil moist but not soggy.
  • Keep traffic off the grass for a few days. Foot traffic on freshly dethatched or aerated lawn compacts the soil and damages tender crowns.

Within the first week:

  • This is the right window to overseed, since seed-to-soil contact is best right after aeration. Apply seed at the recommended rate for your grass type and keep the surface moist until germination.
  • If you are not overseeding, apply a starter fertilizer or a balanced fertilizer according to soil test results. For seasonal timing, see when to fertilize fescue in Raleigh. Timing matters, so check with your local extension office or a qualified professional for feeding schedules that fit your recovery window.

Weeks 2-4:

  • Expect some brown, thin patches for a week or two. That's normal. New growth fills in as roots reach the loosened soil.
  • Resume regular watering and mowing once the lawn shows active growth. Keep the mower blade sharp and avoid cutting more than one-third of the blade height at a time.
Key Takeaway A simple rule: dethatch, clean up, water, then aerate. After aerating, overseed and feed within the first week, and keep traffic off until new growth appears.

If you want to compare options first, our lawn care cost guide walks through what drives pricing. When you're ready, request a free estimate for aeration and thatch removal, and we'll map out a plan for your yard.

Get a Free Estimate for Aeration and Thatch Removal

Doing this yourself takes a free weekend, the right equipment, and a steady hand. Many homeowners would rather hand it to a crew that does it every week. Everett Lawn Care is licensed and insured, and serves homeowners and businesses across the Triangle area.

If you want to compare options first, our lawn care cost guide walks through what drives pricing. When you're ready, request a free estimate for aeration and thatch removal, and we'll map out a plan for your yard.

Frequently Asked Questions

Should I dethatch my lawn before aerating it?

Yes, dethatch first when the thatch layer is thicker than about ½ inch. A mat of thatch absorbs the impact of aerator tines, so the machine pulls fewer soil cores and the holes close up faster. Removing thatch gives the tines a clean path into the soil. If your thatch is thin, skip dethatching and go straight to core aeration. Wait a few days between the two jobs so the lawn can settle.

What is better for my lawn, aeration or dethatching?

They solve different problems, so the answer depends on what your lawn needs. Dethatching removes the brown layer of dead stems and roots sitting on the soil surface. Core aeration pulls soil cores to relieve compaction and open channels for air, water, and nutrients. If thatch measures over ½ inch, dethatch first. If the soil is hard and water puddles, aerate. Many lawns in the Triangle need both, in that order.

How do I know if my lawn has too much thatch?

Cut a small square of turf about 3 inches deep with a spade and lift it. Look at the brown, spongy layer between the green grass and the soil. A ¼-inch layer is healthy and breaks down naturally. Anything over ½ inch is excessive and blocks water penetration. You can also press a finger into the turf; if it feels springy like a cushion, thatch is likely too thick.

When should I dethatch and aerate my lawn?

Time both jobs to your grass type. Cool-season grasses such as tall fescue do best in early fall, when temperatures drop and the lawn can recover before winter. Warm-season grasses like Bermuda and zoysia should be dethatched in late spring or early summer, during active growth. Avoid dethatching during summer heat stress or right before dormancy, and make sure the soil is slightly moist, not soggy, on the day you work.


Thick thatch and hard soil won't fix themselves, and the longer you wait, the more the mat builds. Let Everett Lawn Care handle the measuring, dethatching, and core aeration with licensed, insured crews who know local lawns. Get started with Everett Lawn Care and give your grass the air, water, and nutrients it's been missing.

GoogleAdd everett-lawncare.com as a preferred source on Google →

Everett Lawn Care

Loading your experience…

Please wait — this usually finishes in a few seconds.